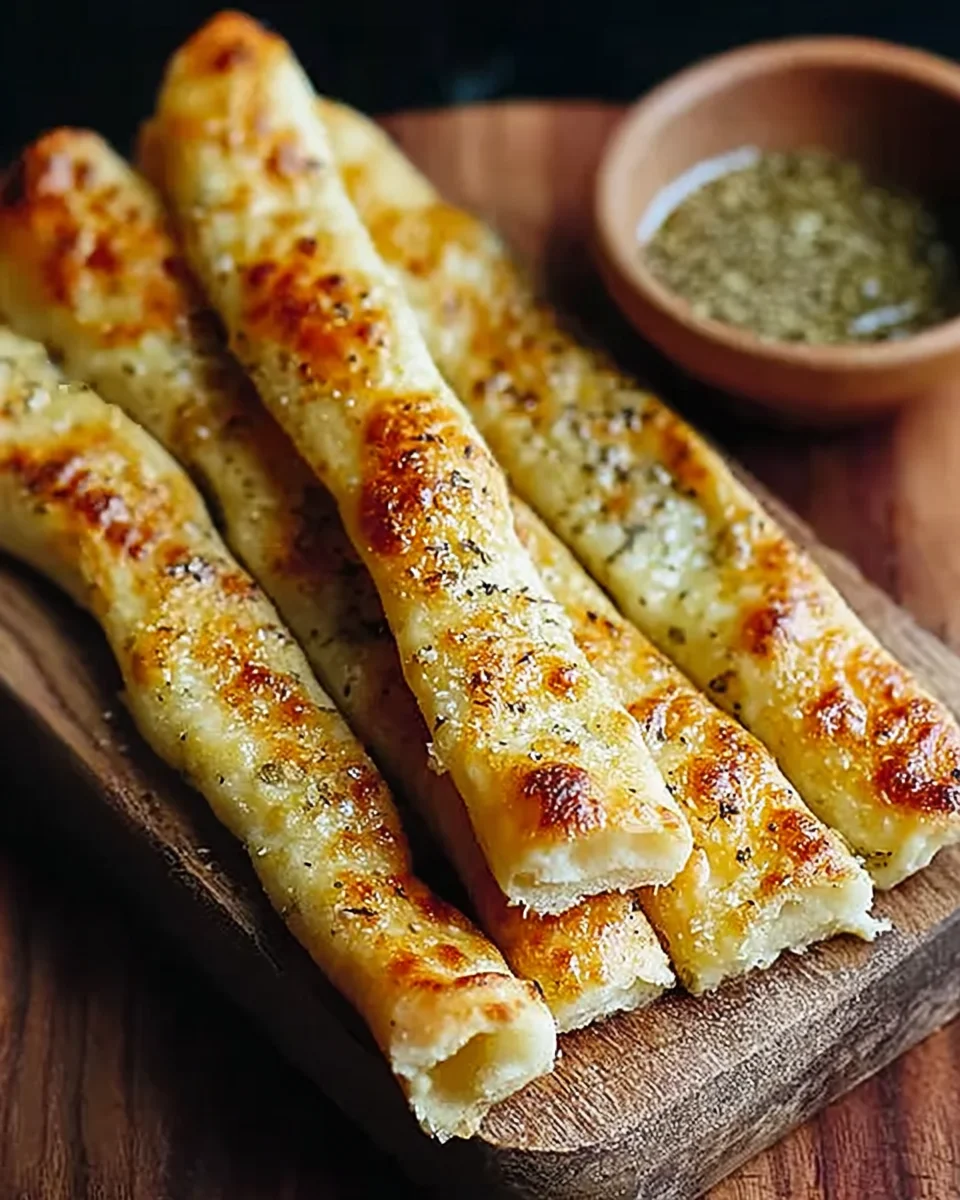
Sourdough Cheesy Breadsticks
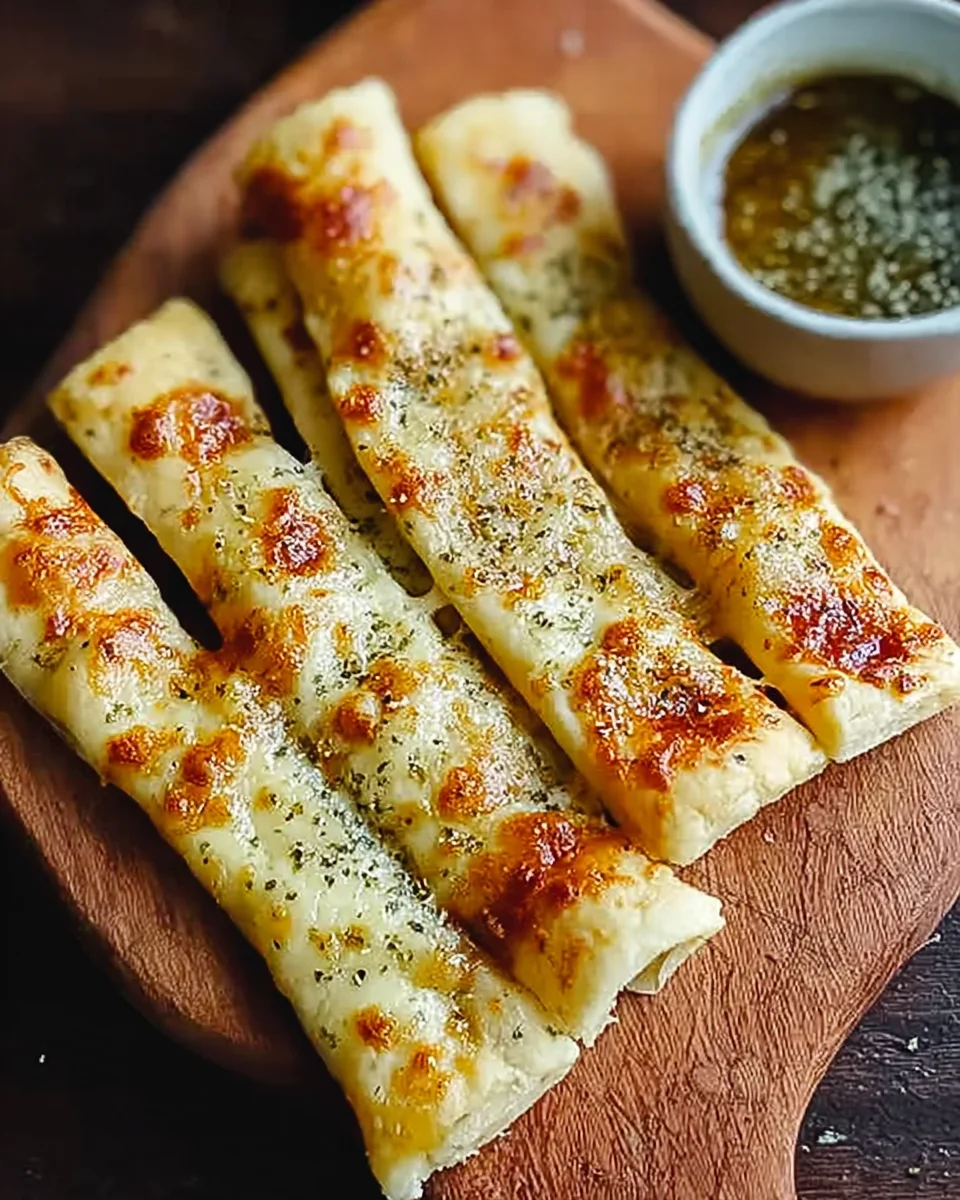
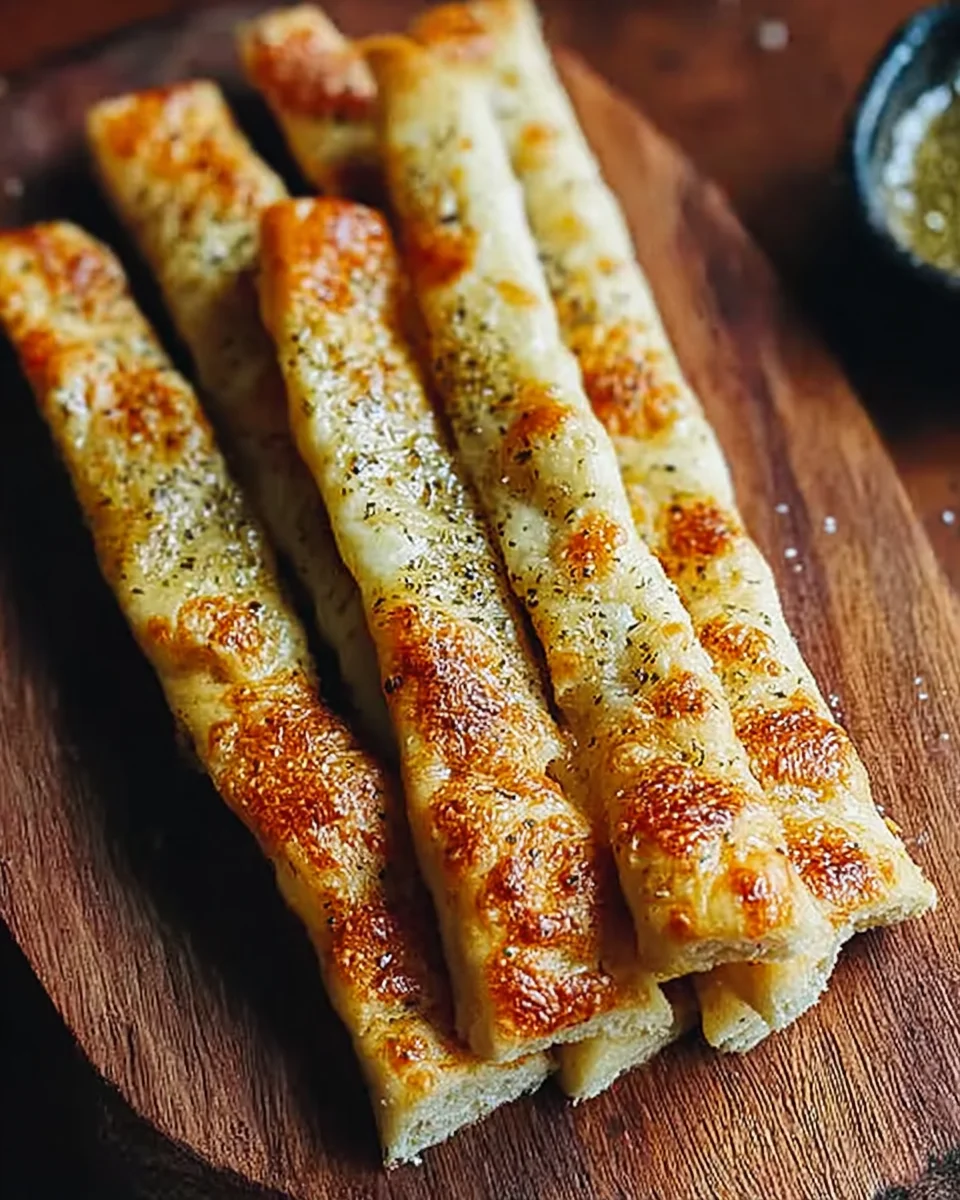
Quick and easy sourdough cheesy breadsticks are a delightful treat, perfect for snacking or serving at parties. These breadsticks not only help you utilize sourdough discard but also deliver incredible flavor with a buttery, herby topping and gooey cheese. Whether you’re hosting a game day gathering or just enjoying a cozy night in, these cheesy delights will surely impress.
Why You’ll Love This Recipe
- Delicious Flavor: The combination of garlic butter, Italian herbs, and melted cheese creates an irresistible taste that pairs well with any meal.
- Simple Ingredients: Made with basic pantry staples, it’s an accessible recipe for anyone looking to whip up something tasty using sourdough discard.
- Quick to Prepare: With a total time of just 30 minutes, you can have warm, cheesy breadsticks ready in no time.
- Versatile Serving Options: These breadsticks are perfect on their own or served alongside marinara sauce or ranch dressing for dipping.
- Great for Parties: Ideal for gatherings or as appetizers, they disappear quickly and always leave guests wanting more.
Tools and Preparation
Before diving into making your sourdough cheesy breadsticks, gather your tools. Having everything ready will make the process smooth and enjoyable.
Grab This Chef Knife Now - Almost Gone!
- Stays Razor-Sharp: Ice-hardened blade keeps its edge longer than ordinary knives
- Superior Grip Control: Unique finger hole design gives you perfect balance and safety
- Built to Last a Lifetime: Premium stainless steel blade with elegant beech wood handle
Customer Reviews ★★★★★
Essential Tools and Equipment
- Stand mixer
- Baking sheet (13×18 inches)
- Plastic wrap
- Mixing bowl
- Rolling pin
Importance of Each Tool
- Stand mixer: This tool ensures your dough is mixed thoroughly and achieves the right texture without much effort.
- Baking sheet: A large baking sheet allows you to spread the dough evenly, ensuring consistent cooking and crispy edges.
- Plastic wrap: Covering the dough while it rises retains warmth and moisture, promoting proper fermentation.
Ingredients
For these delicious sourdough cheesy breadsticks, gather the following ingredients:
Dough Ingredients
- 3/4 cup warm water
- 1 teaspoon active dry yeast
- 1 teaspoon sugar
- 1 teaspoon garlic salt
- 1 tablespoon olive oil
- 1/2 cup sourdough discard
- 2 1/4 cups all-purpose flour
Topping Ingredients
- 2 tablespoons melted butter
- 1/2 teaspoon garlic powder
- 1/2 teaspoon dried parsley
- 1/2 teaspoon dried oregano
- 1/2 teaspoon Italian seasoning
- 1/4 teaspoon salt
- 1/4 teaspoon black pepper
- 1 cup shredded mozzarella
- 1/2 cup grated parmesan
How to Make Sourdough Cheesy Breadsticks
Step 1: Prepare the Dough
Mix warm water, yeast, and sugar in a stand mixer bowl. Let it sit until foamy, which should take about 5 minutes. This step activates the yeast.
Step 2: Combine Ingredients
Add garlic salt, olive oil, and sourdough discard to the foamy mixture. Gradually mix in the flour using the dough hook until the dough becomes smooth and elastic. This usually takes around 4 minutes.
Step 3: First Rise
Place the dough in a bowl and cover it with plastic wrap. Allow it to rise in a warm spot for about 20 minutes.
Step 4: Shape the Dough
Roll out the dough into a rectangle on a floured surface. Transfer it to a greased 13×18 baking sheet, pressing it into all corners for even cooking.
Step 5: Add Toppings
Brush the rolled-out dough with melted butter. In a small bowl, mix together garlic powder, parsley, oregano, Italian seasoning, salt, and black pepper. Sprinkle this herb mixture over the dough before adding both cheeses generously on top.
Step 6: Second Rise
Let the dough rise again for about 15 minutes while preheating your oven to 400°F (200°C). This additional rise helps create more airiness in your breadsticks.
Step 7: Bake
Place the baking sheet on the lowest rack of your oven and bake for 15–20 minutes until crispy. If needed, move to a higher rack during the last two minutes to brown the top further.
Step 8: Slice & Serve
Once baked to perfection, cut lengthwise and then slice each side into strips—aiming for about 12 strips per side for a total of 24 breadsticks. Serve warm alongside marinara or ranch dressing for dipping!
How to Serve Sourdough Cheesy Breadsticks
Sourdough Cheesy Breadsticks are a delightful snack or appetizer that can be served in various ways. They are perfect for sharing at gatherings or enjoying during family movie nights.
With Dipping Sauces
- Marinara Sauce: A classic pairing, marinara adds a tangy flavor that complements the cheesy goodness.
- Ranch Dressing: This creamy option offers a cool contrast to the warm breadsticks and enhances their flavor.
- Garlic Aioli: For garlic lovers, aioli provides a rich, garlicky dip that pairs beautifully with the breadsticks.
As a Side Dish
- With Soup: These breadsticks are a great side to tomato soup or minestrone, adding texture and flavor to your meal.
- Alongside Salads: Serve them with a fresh garden or Caesar salad for a well-rounded meal.
- On Charcuterie Boards: Include them on a charcuterie board alongside cheeses and cured meats for an elegant touch.
For Parties
- Appetizer Platter: Arrange them on a platter with various dips for guests to enjoy as they mingle.
- Game Day Snacks: Perfect finger food for watching sports, these cheesy breadsticks will be the star of your snack table.
How to Perfect Sourdough Cheesy Breadsticks
Making perfect Sourdough Cheesy Breadsticks is easy with a few helpful tips. Follow these suggestions to elevate your baking experience.
- Use Fresh Ingredients: Ensure your yeast is active by checking its expiration date. Fresh ingredients yield better results.
- Knead Properly: Kneading the dough until it’s smooth and elastic helps develop gluten for a better texture.
- Let Dough Rise Fully: Give the dough enough time to rise; this ensures your breadsticks will be fluffy and airy.
- Experiment with Toppings: Feel free to add different cheeses or herbs based on your taste preferences.
- Bake Until Golden Brown: Keep an eye on the color; golden-brown breadsticks indicate they are perfectly baked.
- Serve Warm: Enjoy them fresh from the oven for the best flavor and texture.
Best Side Dishes for Sourdough Cheesy Breadsticks
Sourdough Cheesy Breadsticks can be paired with several delicious side dishes to create a complete meal. Here are some excellent options:
- Caesar Salad: A classic salad with romaine lettuce, croutons, and creamy dressing that balances out the richness of the breadsticks.
- Tomato Soup: A warm bowl of tomato soup is comforting and pairs beautifully with cheesy flavors.
- Garlic Roasted Vegetables: Roasted seasonal vegetables seasoned with garlic make for a healthy and flavorful side.
- Stuffed Peppers: Colorful bell peppers stuffed with rice, beans, and spices offer a hearty complement to light breadsticks.
- Bruschetta: Fresh tomato bruschetta adds bright flavors that enhance your cheesy treat.
- Antipasto Platter: A selection of cured meats, olives, and cheeses creates an Italian-inspired feast when served alongside your breadsticks.
Common Mistakes to Avoid
Making Sourdough Cheesy Breadsticks can be fun and satisfying, but it’s easy to make mistakes along the way. Here are some common pitfalls to avoid.
- Skipping the yeast activation – Not allowing the yeast to foam can lead to dense breadsticks. Always let the yeast, sugar, and warm water sit for about 5 minutes.
- Overworking the dough – Mixing too long can make the breadsticks tough. Aim for smooth and elastic, usually just 4 minutes with a dough hook.
- Neglecting to rise twice – Skipping the second rise will result in less fluffy breadsticks. Be sure to cover your dough and let it rise again for at least 15 minutes.
- Using too much flour – Adding excess flour can dry out your dough. Use just enough to prevent sticking while rolling it out.
- Not monitoring baking time – Overbaking can lead to hard breadsticks. Keep an eye on them during the last few minutes; they should be crispy but not burnt.
Storage & Reheating Instructions
Refrigerator Storage
- Store leftover Sourdough Cheesy Breadsticks in an airtight container.
- They will last for up to 3 days in the refrigerator.
Freezing Sourdough Cheesy Breadsticks
- Wrap each breadstick individually in plastic wrap, then place them in a freezer bag.
- They can be frozen for up to 3 months.
Reheating Sourdough Cheesy Breadsticks
- Oven – Preheat your oven to 350°F (175°C). Heat for about 10-12 minutes until warmed through.
- Microwave – Place breadsticks on a microwave-safe plate; heat in short bursts of 15-20 seconds until warm.
- Stovetop – Warm in a skillet over medium heat, turning occasionally until heated through.
Frequently Asked Questions
Here are some common questions about Sourdough Cheesy Breadsticks.
Can I use different cheeses?
Yes! Feel free to mix cheeses like cheddar or gouda for added flavor.
How do I customize my Sourdough Cheesy Breadsticks?
You can add toppings such as red pepper flakes, jalapeños, or even bacon bits before baking for extra flavor.
What should I serve with Sourdough Cheesy Breadsticks?
They pair perfectly with marinara sauce, ranch dressing, or even a hearty soup for dipping.
How do I know when they are done baking?
Look for a golden-brown top and crispy edges. If needed, move them to a higher rack for browning during the last couple of minutes.
Final Thoughts
Sourdough Cheesy Breadsticks are not only delicious but also versatile and perfect for any occasion. You can customize them with various toppings or dips according to your preference. Give this recipe a try and enjoy the amazing flavors!

Sourdough Cheesy Breadsticks
- Total Time: 30 minutes
- Yield: About 12 servings (24 breadsticks) 1x
Description
Indulge in the savory goodness of Sourdough Cheesy Breadsticks, a perfect blend of crispy, gooey, and herby delights. These easy-to-make breadsticks utilize sourdough discard, transforming leftovers into a delicious snack or appetizer. With a rich garlic butter topping and a generous layer of melted mozzarella and parmesan cheese, they are irresistible straight from the oven. Whether you’re sharing them at parties or enjoying them during family movie nights, these cheesy breadsticks will quickly become a favorite.
Ingredients
- 3/4 cup warm water
- 1 teaspoon active dry yeast
- 1 teaspoon sugar
- 1 tablespoon olive oil
- 1/2 cup sourdough discard
- 2 1/4 cups all-purpose flour
- 2 tablespoons melted butter
- 1/2 teaspoon garlic powder
- 1/2 teaspoon dried parsley
- 1/2 teaspoon dried oregano
- 1/2 teaspoon Italian seasoning
- 1/4 teaspoon salt
- 1/4 teaspoon black pepper
- 1 cup shredded mozzarella
- 1/2 cup grated parmesan
Instructions
- In a stand mixer bowl, combine warm water, yeast, and sugar; let it foam for about 5 minutes.
- Add olive oil and sourdough discard to the mixture. Gradually mix in flour using the dough hook until smooth.
- Cover the dough with plastic wrap and let it rise in a warm spot for about 20 minutes.
- Roll out the dough into a rectangle on a floured surface and transfer it to a greased baking sheet.
- Brush with melted butter; sprinkle with garlic powder and herbs before adding mozzarella and parmesan cheese.
- Let it rise again for about 15 minutes while preheating your oven to 400°F (200°C).
- Bake for 15–20 minutes until golden brown and crispy.
- Slice into strips and serve warm.
- Prep Time: 10 minutes
- Cook Time: 20 minutes
- Category: Appetizer
- Method: Baking
- Cuisine: Italian
Nutrition
- Serving Size: 2 breadsticks (70g)
- Calories: 210
- Sugar: 0g
- Sodium: 380mg
- Fat: 9g
- Saturated Fat: 4g
- Unsaturated Fat: 5g
- Trans Fat: 0g
- Carbohydrates: 26g
- Fiber: 1g
- Protein: 8g
- Cholesterol: 15mg

